The Best Party Trick Ever: How to Make Thirty Minute Mozzarella
http://farmersmarkets.streamshare.com/posts/10807
 The following is a guest post from Andrew Wilder of Eating Rules. Welcome, Andrew!
A couple of years ago at a Fourth of July party, I pulled off one of my best party tricks ever.
Showing up with a gallon of milk in hand, I asked my friends if I could borrow their kitchen. Spying the other items in my bag — a bunch of fresh basil and cherry tomatoes — they knew I had something good in store. They eagerly let me take over.
Half an hour later, I emerged victorious from the kitchen with a platter of fresh caprese, made with still-warm mozzarella.
I’ve been using this “30-minute Mozzarella” recipe, from Ricki Carroll’s book, Home Cheese Making
 ,
for a few years now. I’ll admit, it comes out slightly different each
time (the type of milk, how quickly you heat it, and how much you
stretch it will affect both the flavor and texture), but it’s always
been a big hit.
,
for a few years now. I’ll admit, it comes out slightly different each
time (the type of milk, how quickly you heat it, and how much you
stretch it will affect both the flavor and texture), but it’s always
been a big hit.Homemade Mozzarella Tips & Tricks
1. This is a great recipe to make with kids. They’ll be completely mesmerized watching the milk curdle and turn into cheese — and it happens quickly enough to hold their attention. The last few steps can get pretty hot, so please do be careful when making this with children.2. Do not use “Ultra-Pasteurized” milk for this recipe — it won’t curdle properly. If it says just “Pasteurized” on the container, you’re probably fine. Of course, you can also use raw milk instead, if that’s your thing (I’m not going to get into the pros and cons of raw vs. pasteurized milk — just remember that Ultra-Pasteurized is a dealbreaker.)
3. Depending on the fat percentage of your milk, you’ll get a very different cheese at the end. Whole milk produces a very rich, soft mozzarella, whereas 1% will make a harder, more string-cheese-like cheese. Fat free can get a bit too rubbery, so I don’t recommend it. I usually use 2%, which is what’s shown in the pictures here.
I’ve also made this recipe with goat’s milk, and it should work fine with sheep’s milk as well.
4. This recipe is a “shortcut” to mozzarella, since it uses a microwave to speed things along. If you don’t have a microwave, you can use a pot of very hot water and float a bowl in it instead. The goal is to get the curds hot so that they melt together and become stretchy like taffy. Also, the curds will get quite hot — it’s really helpful to have a pair of clean kitchen gloves to protect your hands.
Thanks go to my friend Sarah, who eagerly offered to model for the photos in exchange for some fresh mozzarella.
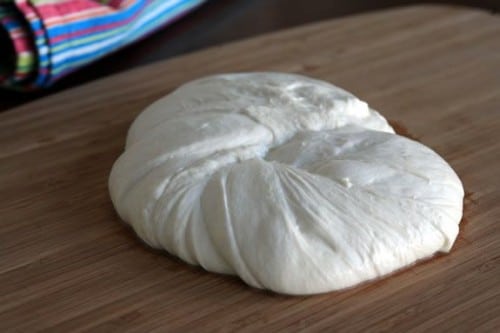 All photos by Andrew Wilder
Recipe: Thirty Minute Mozzarella
You can probably find citric acid at a good grocery store, but rennet is harder to come by. You can order it online at several retailers; I’ve purchased it from New England Cheesemaking Supply and Grape and Granary.You can also just get one of Ricki’s Mozzarella and Ricotta Cheese Making Kit
 , which have everything you need, including a dairy thermometer.
I prefer to use liquid vegetarian rennet, which New England Cheesemaking Supply sells at double-strength, so I use 1/8 tsp. for this recipe.
Ingredients
- 1 gallon Milk, not ultra-pasteurized
- 1 1/2 tsp. Citric Acid powder, dissolved in 1/4 cup room-temperature water
- 1/4 tsp. Liquid Rennet or 1/2 tablet Rennet, dissolved in 1/4 cup room-temperature water
- 1 tsp. Cheese (Flake) Salt or Kosher Salt
1. Pour the milk in to a large pot. On medium-low, heat slowly to 55 degrees Fahrenheit. Stir slowly and continuously to keep from scalding.
2. Once the milk reaches 55 degrees, pour in the citric acid mixture and stir well. Keep heating.
3. When the milk hits 88 degrees, add the rennet mixture and stir well. Right around this time the milk will start to thicken, and you’ll see little white flecks stick to your spoon as it starts curdling.
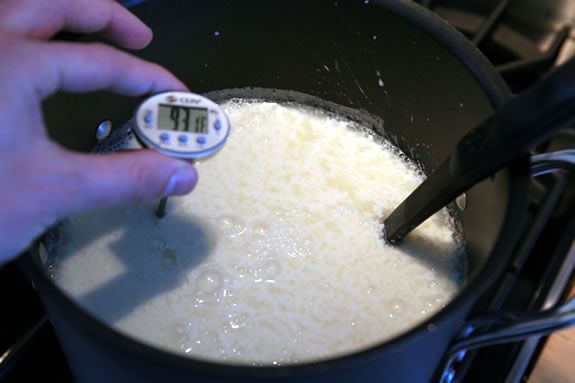
4. Once the milk is in the 90-degree range, it should be noticeably curdled. Stir very gently at this point, if at all — you want to encourage the curds to knit together.
5. Between 95 and 105 degrees, the curds will be quite thick. Turn off the heat once they start separating from the sides of the pot, and there’s a very clear distinction between the curds (white clumps) and whey (yellow liquid).
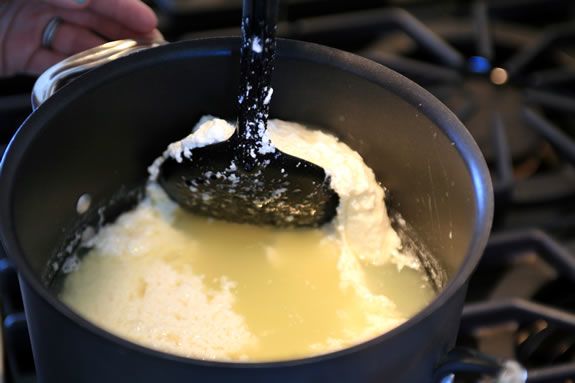
6. Let the curds rest for 5 minutes.
7. With a perforated or slotted spoon, ladle the curds into a bowl. The curds will continue expelling whey once they’re in the bowl, which is fine. Once you have pulled most of the curds out of the pot (some little bits will probably still be floating about), pour any excess whey back in the pot.
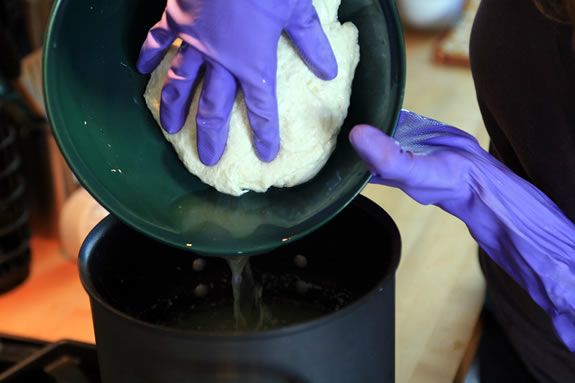
8. Using a microwave, heat the curds for 60 seconds. Drain off any excess whey, then fold the curds over once, then once again. This is to distribute the heat evenly.
9. Microwave again for about 30-40 seconds, depending on the strength of your microwave. Pour off the whey.
10. Sprinkle the salt onto the cheese, and then fold the curds over twice again. Put them back into the microwave for another 30-40 seconds. Pour of any excess whey.
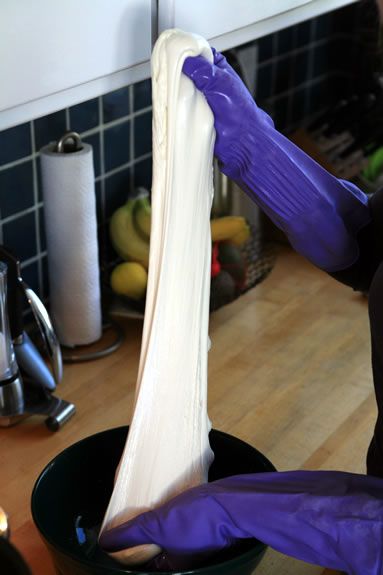
11. At this point, the cheese should be very hot, and look like melted mozzarella!
12. Stretch the cheese, and then fold it back on itself. If it tears when you try to stretch it, the cheese is not hot enough; just repeat the microwaving process. Stretch it again once or twice. If you want a more string-cheese like cheese, do it a few more times.
13. You can then twist or braid the cheese, or tear off pieces and roll them into small balls. If you’re going to refrigerate the cheese for later, drop it in a bowl of ice water to get the temperature down quickly. Otherwise, just dig in while it’s still warm!
Editor’s note: Don’t toss that whey! You can use it in pancakes or crepes.
What do you say, are you up for a ‘cheesy’ party trick?


